This will explain the User Interface and features.
The Tools for the Guardian Glass for BIM application appear on the Revit menu.
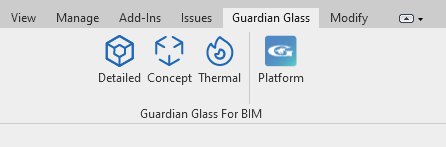
Depending on whether your project is a Detailed model or Conceptual model, select the correct tool on the Revit menu.
The Thermal Tool is for advanced assignment of values to Revit elements to get an overall IGU value.
The Platform Tool will provide a link to your online Account.
DETAILED MODEL
For Detailed models, click on the ‘Detailed‘ Tool.
You may be asked to enter your Guardian Account email if you are starting for the first time or have been logged out.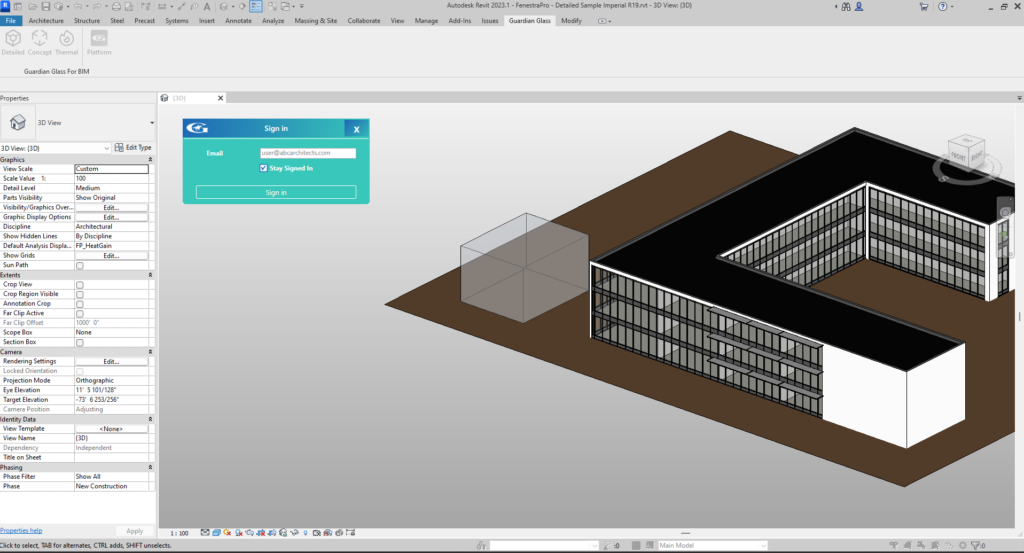
This will open the Start window.

The model elements will load into the application. Assuming that the energy model creates successfully in Revit, you may continue to the main window.

This window is where glass properties of Revit elements are checked and you may also check the model for issues (optional).
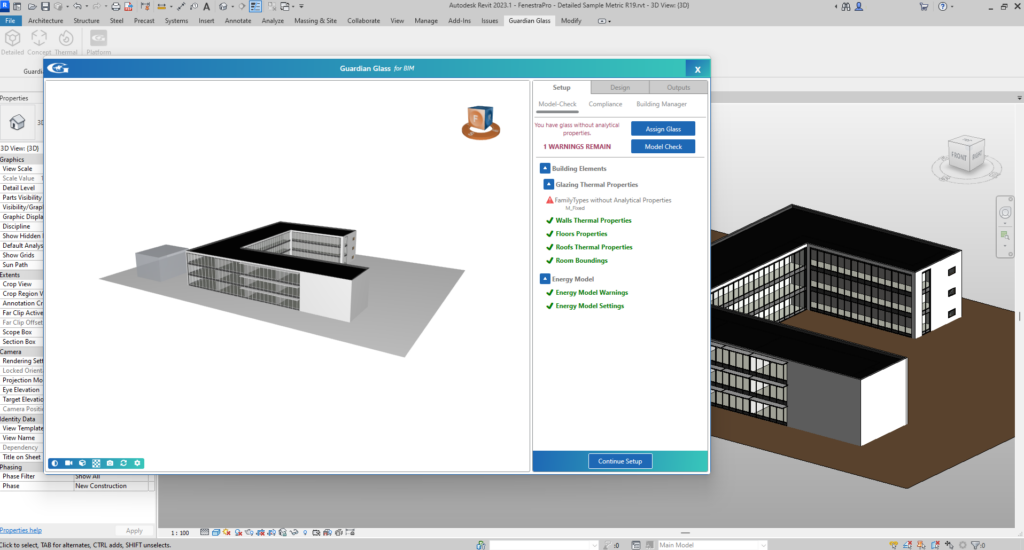
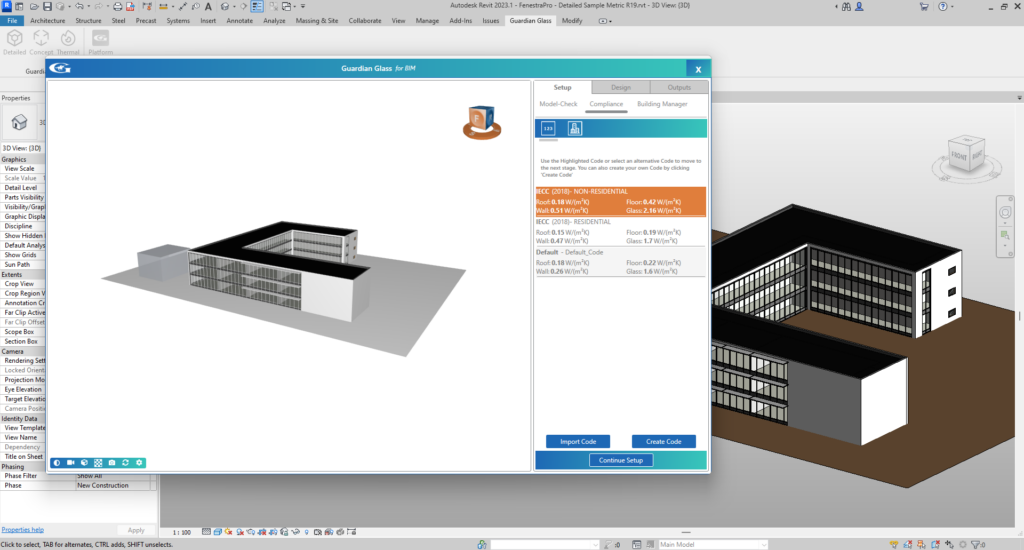
The next stage is selecting an Energy Code for your project. Suggested Codes may display for some regions (not all regions are yet supported), or you may create a Code for your project.
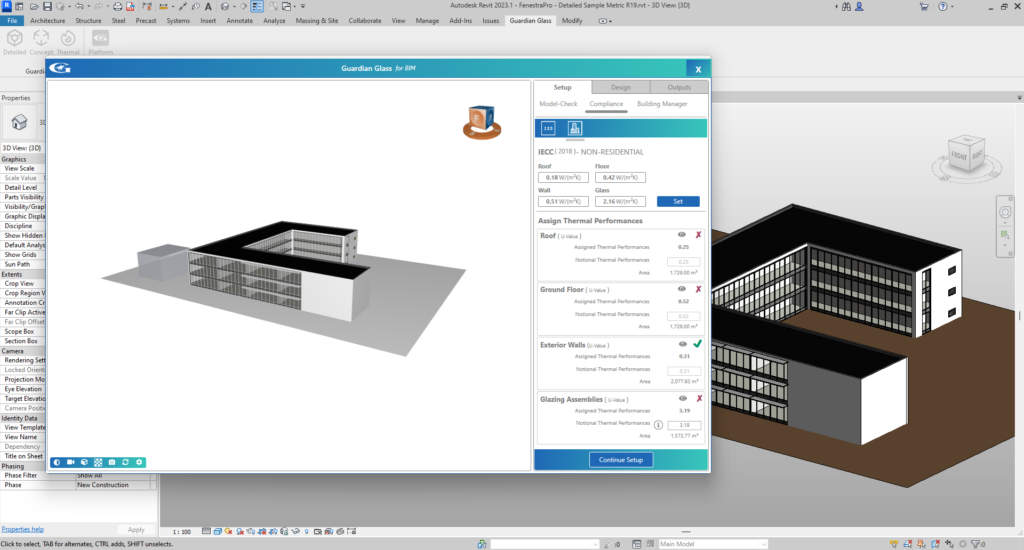
The next stage is checking compliance of the Revit elements (U-values/R-values) against the selected Code values for each category (wall, floors, roofs, glazing).
The final stage of on-boarding your project is to check the settings for your project and get results.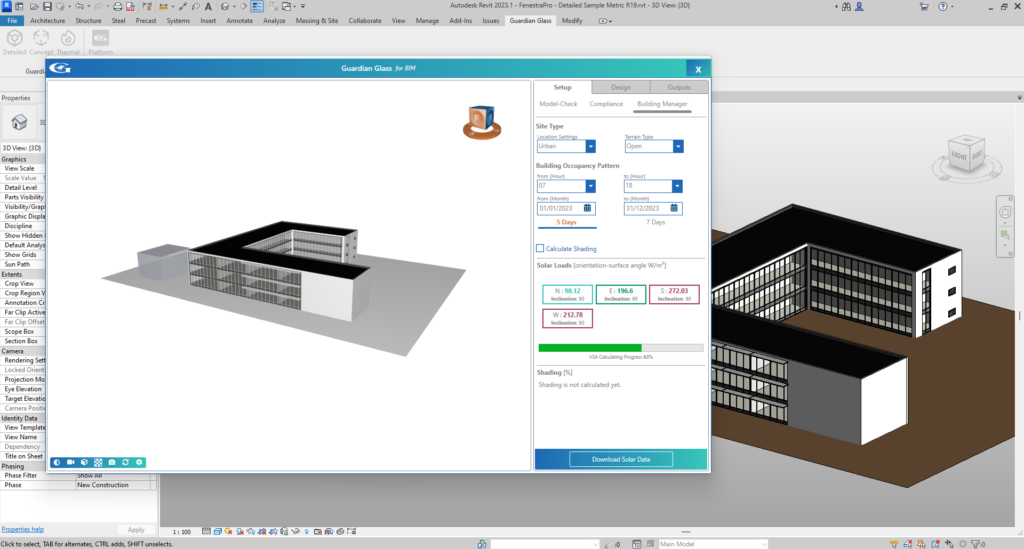
You may then enter the main window of the application.
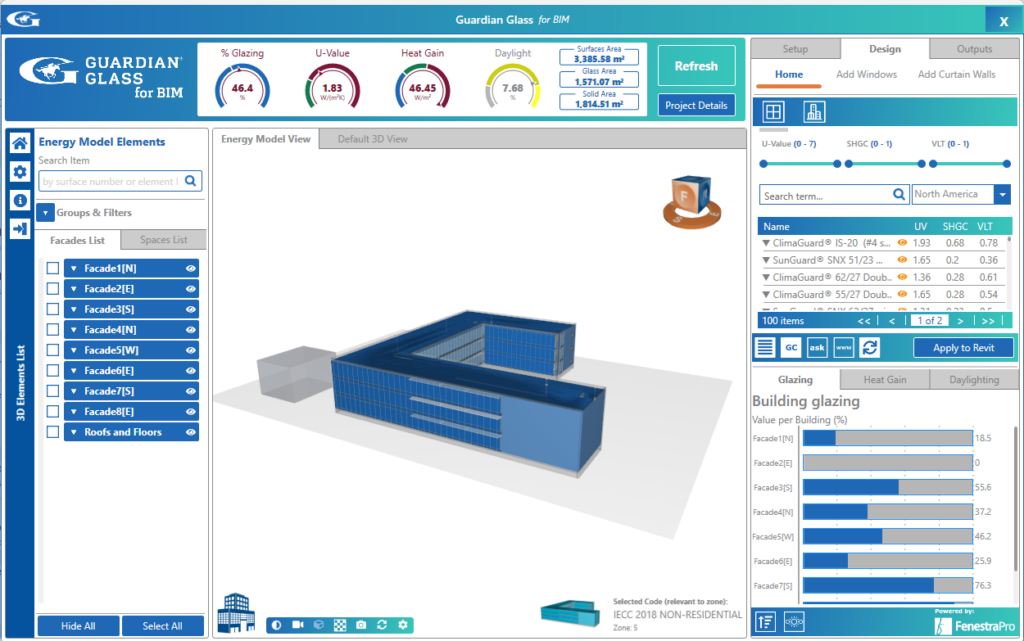
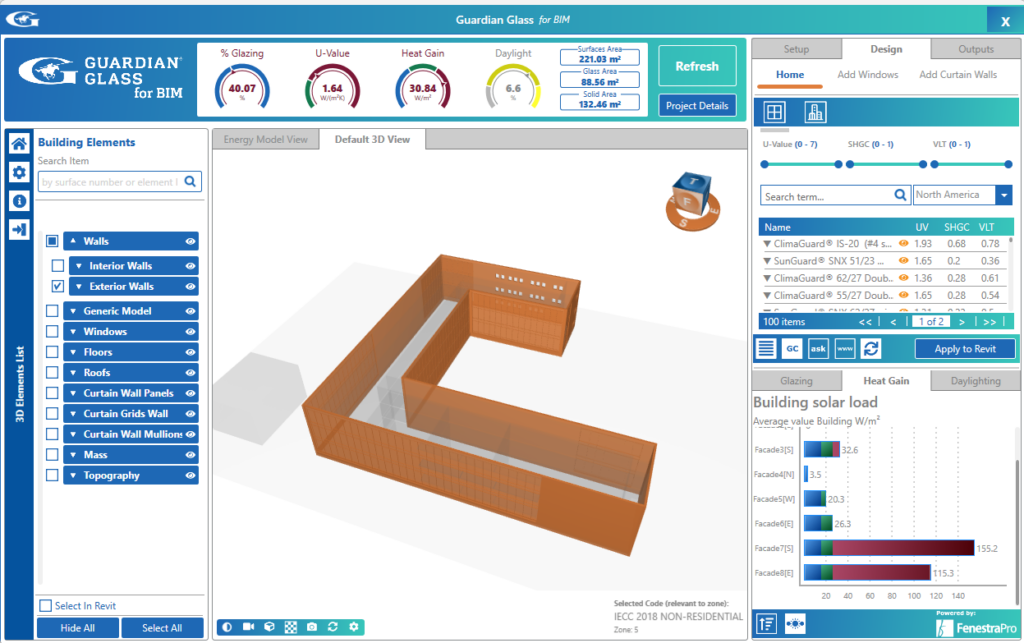
The model viewer in the application has options for displaying Energy Surfaces/Energy Spaces or Building Elements. Use the tabs at the top of the viewer to toggle between the options.
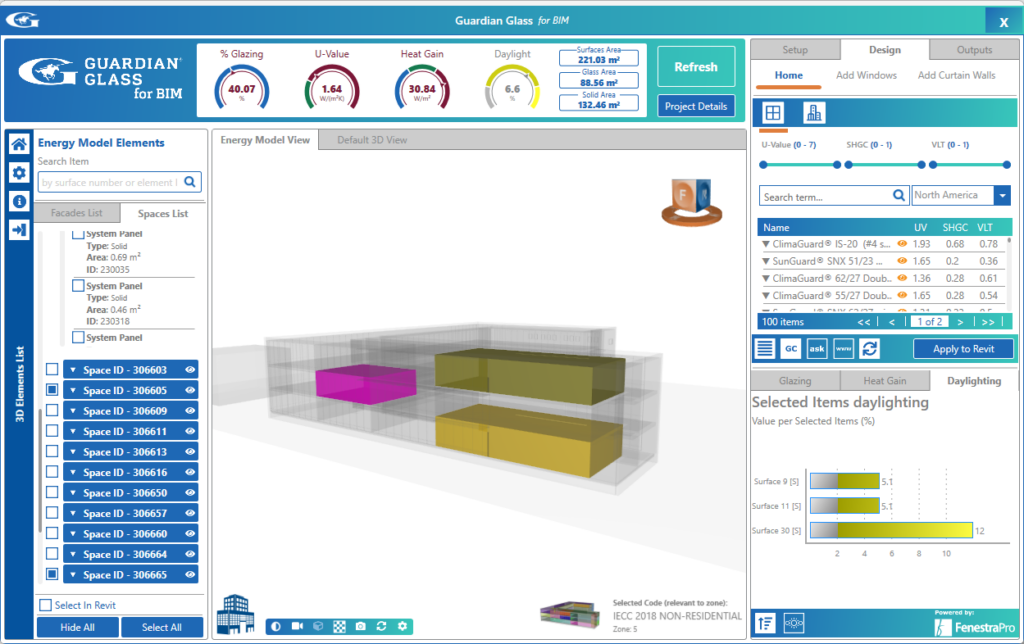
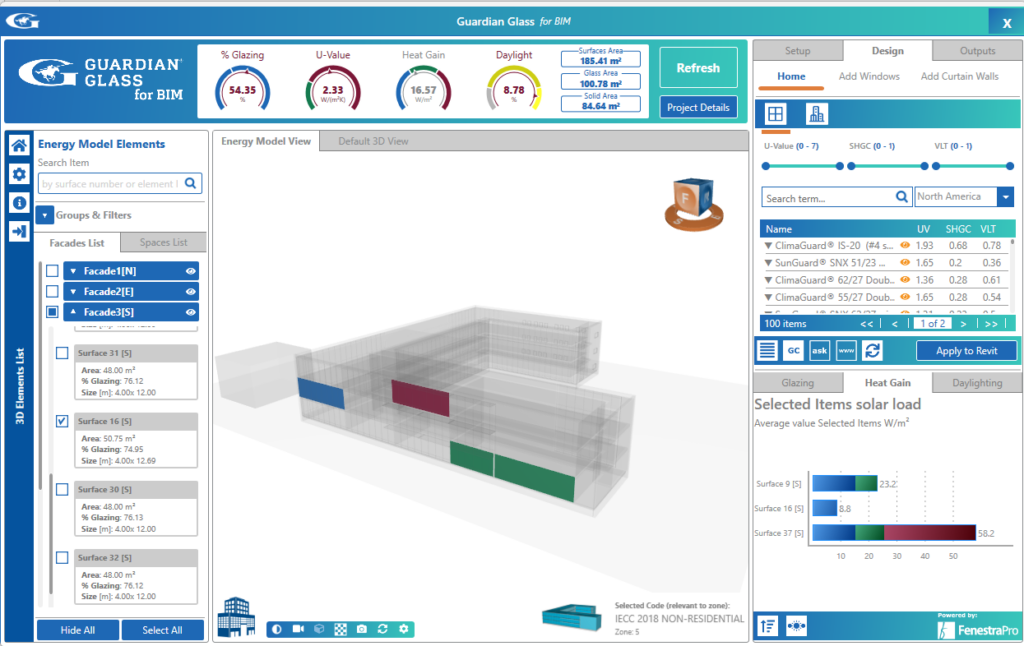
Selections may be made (Energy Surfaces)using the list on the left hand side, from the model in the application viewer, from the Charts or from the Revit model itself.
There is also a tab to view Energy Spaces in the model and these may be selected also from the list or model viewer.

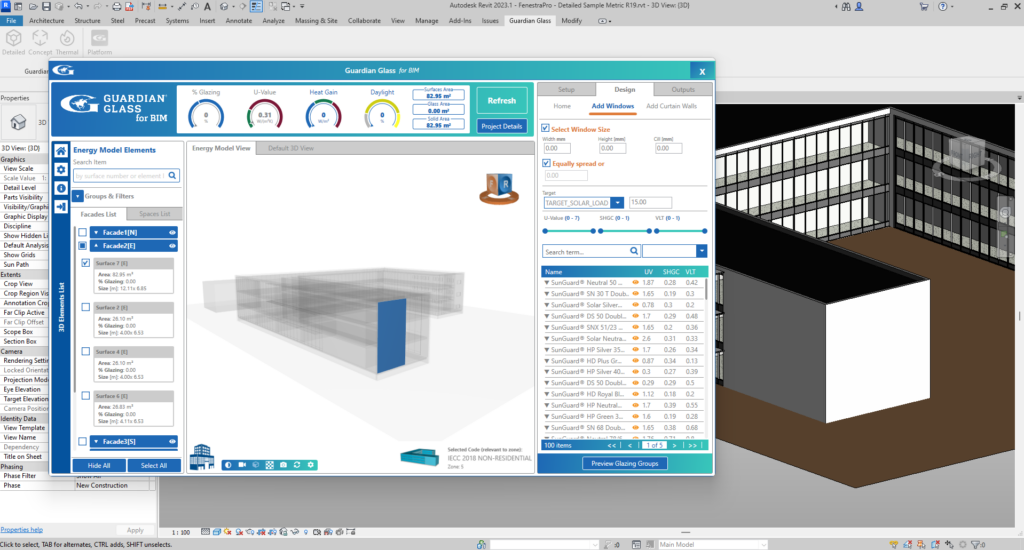
There is also a feature to Add Windows to solid walls on the model (Select a Surface(s) and click on the ‘Add Windows’ tab).
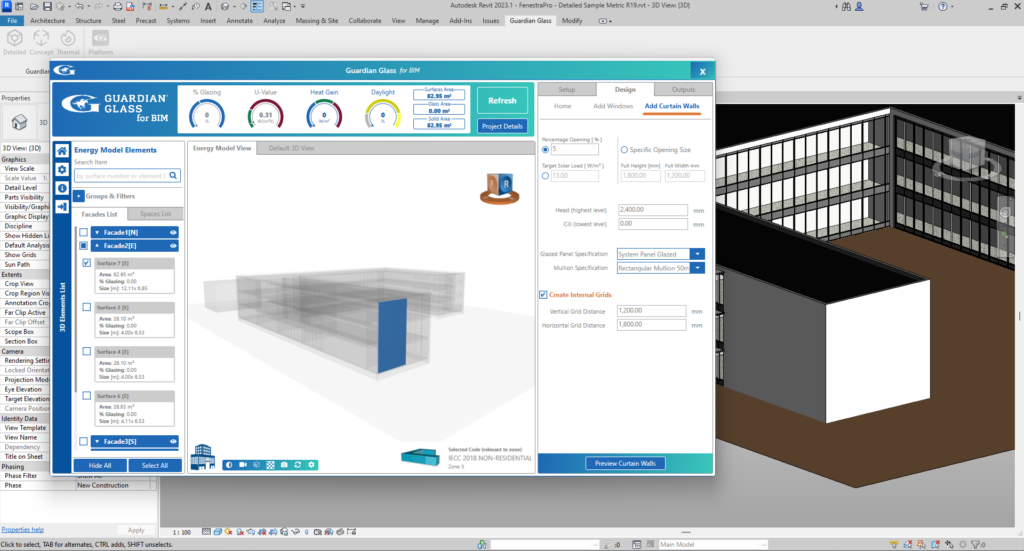
There is also a feature to Add Curtain Walls to solid walls on the model.
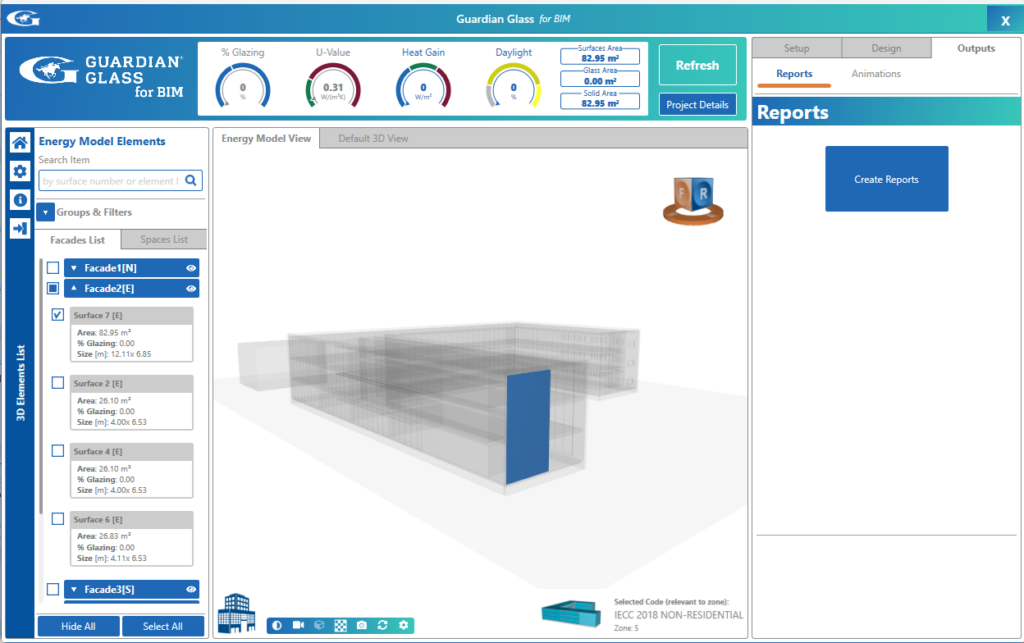
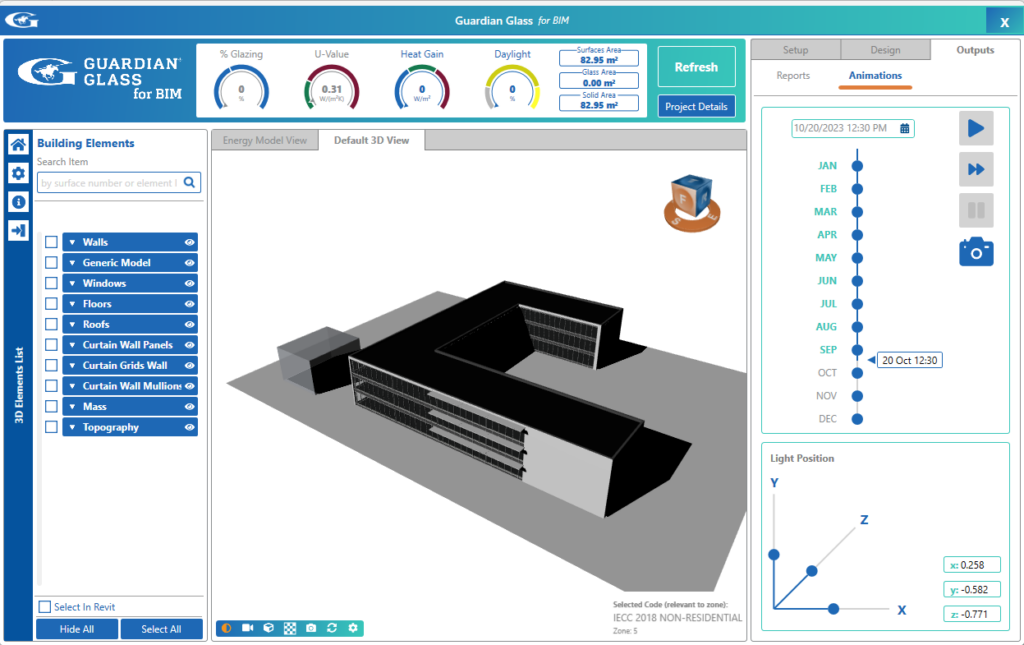
The Outputs tab provides access to saving a Report and Shading Animations of shadow studies.
CONCEPTUAL MASS
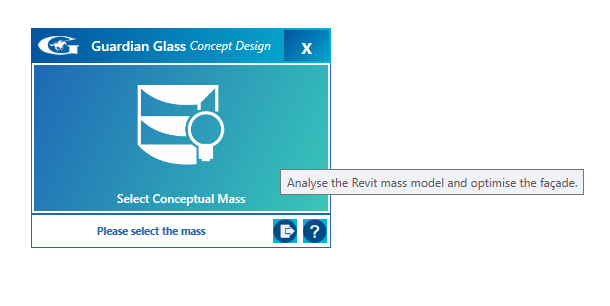
When using a Conceptual Mass model in Revit, click on the ‘Concept’ tool.
A dialog window will open. Click on this window and it will ask you to select the Conceptual Mass in the project to analyze. Select the correct mass model that you wish to analyze.
The Building Manager will open where there are a few settings to be reviewed for the project (terrain type, location, occupancy hours etc).
If there are significant shading factors in the project (Surrounding buildings/objects have been also modelled, the shape of the design may cause shading effects etc), then turn on ‘Calculate Shading Factors‘. Then click on the ‘Calculate Solar Data‘ button to get results for your project.

Once this is complete, you may close the Building Manager (a message will advise).
Then in the Performance Manager, you can select an Energy Code for the project. You may see suggested Codes displayed in the dropdown list or you may create a Code using the pencil icon. Apply these Code values using the checkmark button beside the Codes list. This will update element categories so they comply with Code values.
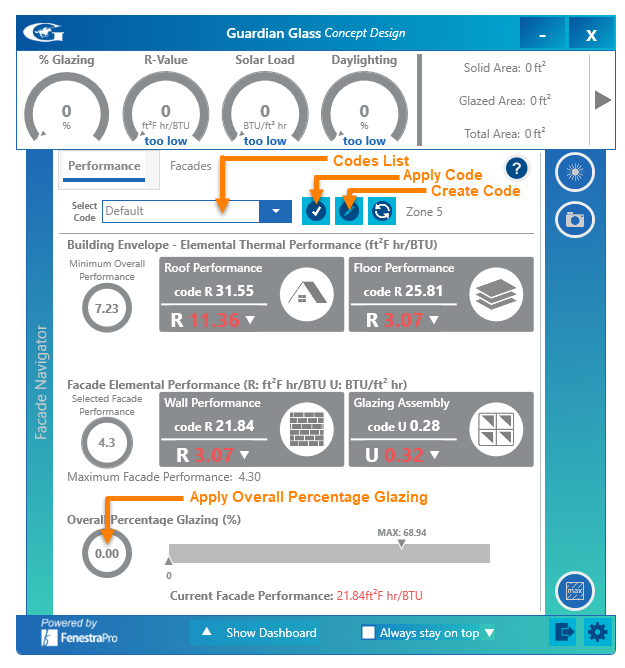
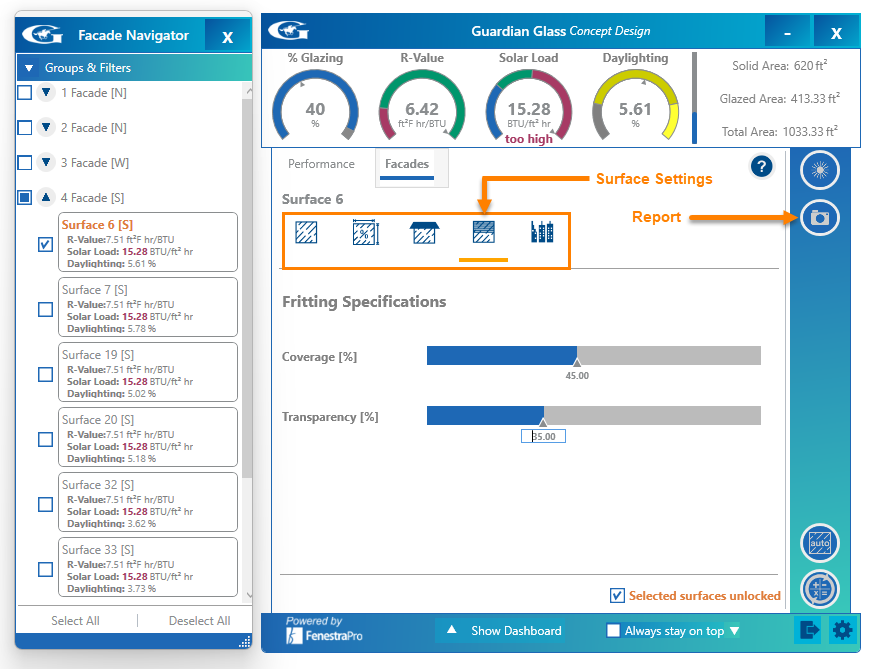
Apply an Overall Glazing Percentage to the model by typing in a value into the circle. Then press Return on your keyboard to update the Revit model.
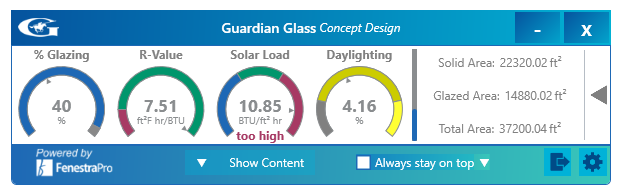
The Dashboard will display results for the selections made in the Facade Navigator. When nothing is selected, the results refer to the entire model.
Under the Facades tab, you may select specific areas of the model by opening the Facade Navigator and then define settings for each independently (shading canopies, glass types, glass to wall ratios, fritting etc). Use the camera icon on the toolbar to save a Report of your results, element properties, glazed areas etc.