-
Ensure that the Site Location is set correctly in Revit (this will affect Climate data and Solar Loads). This may be set in the Manage Tab.
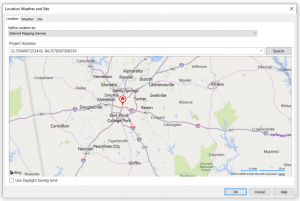
- Ensure that True North orientation is set correctly for the project on site. This will affect orientations and results.

-
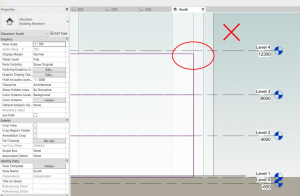
Ensure that Levels are set correctly in the model and that Floors/Roofs align with these levels.
-
Ensure that the Energy Units are correct for your model. This is usually not necessary to modify but may happen on occasions if a model is converted between metric and imperial. This may be checked in Revit’s Manage Tab – Project Units – Energy Units.

-
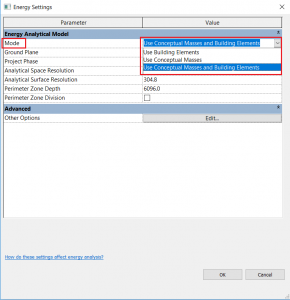
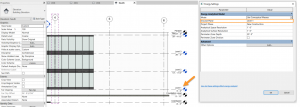
The Mode that is used should be appropriate for your model type (For Mass models choose ‘Use Conceptual Masses’. For Detailed models choose ‘Use Conceptual Masses and Building Elements’). Check the Energy Settings in Revit. This may be done by going to the Analysis Tab and finding the Energy Settings tool.
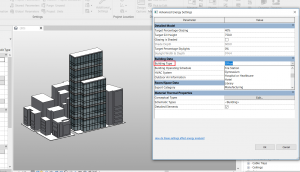
6. Ensure that the Building Type is set correctly for your project.
-
It is a good idea to create the Energy Model in Revit if the project has not been analysed before and to check for any warnings in the Manage Tab. Any issues that require attention may be resolved before launching the application.
-
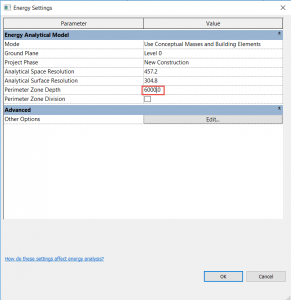
Ensure that the Ground Plane set in the Energy Settings is the appropriate level to begin analysis. Models that have Foundation, Crawlspace and Parking Levels may not require analysis. These areas may be ignored by setting an appropriate Level above.
-
Check the Perimeter Zone Depth is appropriate for your project.
-
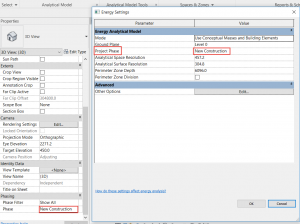
Check that the Phase set in the Energy Settings matches that in the Revit View.
-
Check that Analytical Resolutions set in the Energy Settings are correct (Revit default values may be left as they are). This will define the tolerance of gaps between elements in the model. If these are set to a lower value, this will increase the time generating the Energy Model. The values set should also be less than any surface you wish to include eg. If the value set is 6’-0” but there are surfaces of only 3’-0” in the model, these surfaces will be ignored.
-
It is a good idea to Create the Energy Model in Revit if the project has not been analyzed before and you wish to check for any warnings or suspect that there may be modeling issues. Any issues that require attention may then be resolved before launching the application. Warnings may be viewed in the Manage Tab of Revit.
-
A lean model is recommended. Calculations will be faster if the model is reduced to the basic envelope and core (internal walls).
Elements that are not required for analysis may be removed if it is convenient eg. Topography, mechanical equipment, structure, plumbing, furniture, unused families, drafting views/details, additional sheets, schedules etc.
It may not suit all workflows to create a separate model for Energy Analysis but this may sometimes be useful to isolate the envelope and reduce the file size.
-
To calculate the Shading Effect from surrounding buildings – use simple mass objects. If detailed buildings are modeled as surrounding objects, these will be also analyzed.

![]()
![]()